Reverse-Side Marking at a Glance
The stud-welding process can sometimes cause reverse-side marking during its application. But what does that mean, exactly? What causes reverse-side marking, and how can you avoid it?
What is Reverse-Side Marking?
Reverse-side marking is the appearance of a blemish on the other side of a parent metal during the process of welding. When energy is applied to a parent metal, it is common that the energy creates some kind of mark on the opposite side of the weld location due to the nature of adding heat and pressure during the welding process—stud welding systems minimize this common occurrence, but there are still factors that can increase the prevalence of this issue.
What Causes Reverse-Side Marking with the Stud Welding Process?
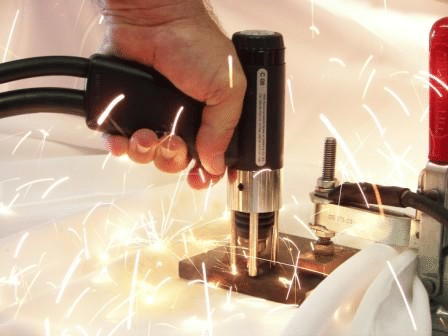
When the stud welding gun plunges the weld stud onto the parent metal, force is applied. Markings are caused by the interaction of this force, the weld stud itself, and the parent metal. The factors at play when stud welding are:
- The diameter of the weld stud (the larger the diameter, the greater the chance of reverse-side marking)
- the material of the stud
- the energy setting of the stud welder
- the thickness of the parent metal
- the material of the parent metal.
Watch our video here to get a grasp on what reverse-side blemishes might look like when using a CD stud gun.
How Can I Avoid Reverse-Side Marking?
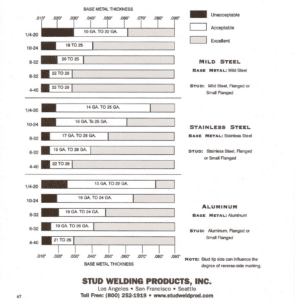
The primary way to avoid blemishes on the reverse side of the weld site actually occurs before welding. Compare your base metal and its thickness with your stud’s material and diameter; then, compare those specifications with the chart provided below. (Mirror-finish parent material will have different results and can be problematic) The appearance of blemishes is always a risk, especially with arc stud welders. This is because arc welders are often used for large diameter studs. As mentioned above, the larger the diameter of the stud, the more risk there is of a reverse-side blemish. Consulting the chart below will help you reduce the occurrence of blemishes and ensure that proper welding is taking place.
Still seeing some markings?
We put together some helpful tips to help you minimize reverse-side markings:
- Make sure you place your parent metal onto a solid, hard surface. Steel works great because it does not allow the parent metal to warp and provides a heat transfer.
- Decrease the weld stud diameter so that you can use less energy during the weld process.
- Reduce the amount of energy/voltage to the lowest setting possible that will still produce strong welds.
- Reduce the amount to spring pressure used on the stud gun.
- Do not torque the weld stud for testing. The force can cause the parent metal to warp. We recommend using the stud welding torque tool to test the stud welds. View it here.
- Some markings can be buffed, or polished out. Results will vary.
- Some markings can be masked during the painting or coating process. Results will vary.
- In some application, using a Gap Stud Welding process may reduce reverse-side markings.
Here at Stud Welding Products, we take great care to manufacture and sell equipment that creates high-quality welds. If you would like to see our line of capacitive discharge equipment, click here!
We also offer many stud welding accessories and a large assortment of capacitive discharge and arc studs! If you’d like to ask us a question about reverse-side blemishes or other stud welding concerns, please call us at 800-252-1919 or email us at info@studweldprod.com


